Being inspired by all of the wall stripes and stencils I've recently seen popping up in blogland, I thought this might be a fun way to decorate some Easter eggs - using a stencil or possibly masking tape to paint plaid and polka dot Easter eggs.
I decided to use decorative eggs vs. real eggs for several reasons: 1) we don't have kids yet and I think dying real eggs is more fun with little ones, 2) I knew this would probably end up being time and labor intensive and I didn't want to have to recreate these eggs annually and 3) it's our first home (meaning I am trying to build a base of "go to" decorations for all holidays) so by using decorative eggs of some sort so I could stash them away for next Easter. Honestly, I don't <3 the end result but I am posting this with the thought that someone out there will figure out how to perfect this project....or at least do a heckova lot better than me. Here are a few close ups of the end result:
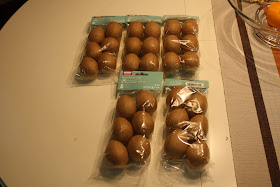
So I picked up these paper mache eggs at Michaels; 6 in a bag for $2.50. Even less if you have a coupon, which I did.....but unfortunately the cashier couldn't get it to work. Whatever.
I also purchased some nautical-inspired Easter colors for our coastal house:
Then I got to work taping off some vertical stripes to paint in one color:
I used white spray paint to spray the entire egg. Once dry, I removed the vertical stripe and this is what the eggs looked like:
Oh yeah, I also used simple round stickers rather than masking tape on a few eggs to attempt polka dot eggs. They look like deranged moles to me, yet I pressed on with the experiment. So once the stripes and
I then painted any areas of the eggs that weren't covered in tape. Most eggs I painted a combination of light blue and dark blue, but a few eggs I painted all light or all dark blue. I then set the eggs to dry on some styrofoam next to another (and much more successful) egg project which I will be posting soon.
Once th paint dried, I removed the masking tape. I also resprayed the polka dot eggs navy, which I like slightly better but still wouldn't consider one of my better projects:
This was a bit time consuming and it took me basically all afternoon....and I felt like I was rushing to finish the entire time...which could explain why they didn't turn out so great. I do love the idea, though, so if any crafty crafters out there have a tip on how to recreate these plaid/polka dot eggs for Easter, I am all (bunny) ears!
Stay tuned for yet another Easter egg posts this week, along with my first ever giveaway!!!!
I will be sharing this post at the following parties this week - stop by and check out some great ideas generously shared by many other fearless, fabulous DIY bloggers out there!


Such fun Easter eggs! Something I may have to try with the kids.
ReplyDeletexo,
cristin
sweet project and a lil different than the average egg. lol
ReplyDeleteso cute. I have a party that goes from Tues afternoon - Thurs, I would love for you to share this.
ReplyDeleteCheers, Tammy
What cute little eggs! Love the colors you used!
ReplyDeleteOk. I need to find some of these mache eggs rather than blowing out the real ones... These look great!
ReplyDeleteThanks for linking up to Making It With Allie! I can't wait to see what you have for next week!
AllieMakes.Blogspot.com
I think the eggs are cute too.
ReplyDeletelisa