
About a month ago, we ordered oak butcher block from Ikea - three slabs of the 96 7/8 x 25 5/8" variety. We have a lot of countertop space but all in, these babies only set us back around $600 (which includes $100 for the optional shipping (rather than store pick up) to our house...and it doesn't include the cost of other supplies like wood conditioner, stain, brushes, water lox, etc.) So, I suppose our "true" all in price would be closer to $1k....but still - c'mon!! That's a steal for all new, natural and did I mention gorgeous kitchen countertops!!!! We also scored with Ikea's version of the farm sink - which I realized isn't available online (unless you live outside the USA) but select American stores do carry this sink. Ikea is obviously a huge maze and can be overwhelming at times, but if you are interested in a farm sink that doesn't cost at least $1k I highly suggest you high-tail it to your nearest Ikea, take a deep breath and brave the crowds to get yourself one of these beautiful (and huge) sinks. Including tax, it should only set you back around $316.00
I will be sharing each and every project we've completed to not only install, but customize Ikea's oak countertops as we move closer to finishing the dream white kitchen similar to my fave inspiration pics here:
 |
| Decor Pad |
 |
| Decor Pad |
 |
| Decor Pad |
 |
| Decor Pad |
 |
| Decor Pad |
 |
| Decor Pad |
 |
| Decor Pad |
 |
| Decor Pad |
 |
| Decor Pad |
 |
| Colour Me Happy |
 |
| Cote de Texas |
 |
| Decor Pad |
 |
| The Cottage Chick |
 |
| The Cottage Chick |
 |
| Decor Pad |
 |
| Decor Pad |
Before I get to the good stuff with my countertop tutorial part 1, here is a recap of our kitchen projects to date:
1) The first phase of our remodel included buying all new stainless steel appliances.
2) The second step was to paint our existing and new (yet icky orange-maple) cabinets white.
3) I am soooo happy we are in the home stretch of the big and expensive aspects of the kitchen remodel; all that will remain after phase 3 (sink and countertop installation) will be installing white subway tile, giving the trash compactor a face lift and possibly installing puck lighting under the upper cabinets. Oh and I'd like to make new curtains.
And without further rambling, here is part 1 our tutorial for installing Ikea's butcher block countertops:
The first step in this process involves measuring and cutting the countertops to size. Before ordering your countertops, it (hopefully) goes without saying that you must measure your current countertop space to determine how much butcher block to order. We needed three of the largest slabs, and we will have a tiny bit leftover.....this made me happy, though, as I realized that 1) I could practice "staining" on these mini slabs and 2) maybe I could rig up some new craft with my leftover scrap butcher block. A project for a rainy day kind of thing.
Once your countertops arrive, it is very important to keep them in their boxes until you are ready to begin cutting and installing them. The reason for this is the longer the wood sits untreated, the more likely it could warp (curve in the middle - a big no-no). So, you must resist the temptation to peek at your new countertops until you're truly ready to get your hands dirty.
When you've set aside a completely empty weekend to work on this, you can unwrap those packages and check out the goods:


Make sure you have a strong friend (or two) with you because what comes next is definitely a two person job. In fact, we were lucky enough to have our extremely talented (and generous with his time) brother-in-law whom happens to be an extremely talented carpenter (check out his website here) to help us:


If you have a basic layout and/or small countertop space, you should be fine doing this yourself; however, we have a larger, U-shaped kitchen with lots of corners and seams so we knew that we could use a little extra help. If you have a similar kitchen you might want to go this route, too, but it all depends on your comfort and skill level.
The first thing


This was done so that we could rest the butcher block onto the new countertop space to mark off measurements onto our new countertops so that they could be cut to size:


We also needed to test out our new (and extremely heavy) sink to make sure she'd fit in her new home:

Tearing out the sink and countertops = no turning back at this point and we have been and will continue to be countertop-less (and sink-less) until the new butcher block is finally installed...but it's a small price to pay for the next several weeks....and it will be so worth it in the end I tell you!
Once the countertops are all cut to size, it's time to drill holes where your brackets will go (these brackets will come with your Ikea package along with directions). The brackets are used to secure the countertops to the cabinets:


Our brother in law had extra brackets so he used them to secure two boards together that form a corner (we will attach the other corners during the final installation):

After all this, we thanked our amazingly awesome and talented brother in law and Mr. C. took over by lightly sanded both sides of the butcher block countertops:


Mr. C used 220-grit sandpaper and a round orbit electrical sander purchased for the job (it cost around $30 and it made the sanding process fly by....plus with the way my DIY-brain works I'm sure we'll be using this sander again in the near future so it was $30 well spent). Mr. C sanded very lightly, as the purpose of the sanding was to just remove the light (one-coat) factory finish applied by Ikea. We needed to remove the finish so that we could stain the wood and then we'll apply a new finish on top of the stain. After sanding, Mr. C. wiped the boards down with tack cloth.
The next step was to apply a wood conditioner; we used Minwax's version:


The purpose of this is to make the wood stain cover and absorb into the wood as evenly as possible. I learned this valuable tip (along with countless other butcher block tips) from This and That. *IMPORTANT note - make sure you are ready to start staining after you've applied the wood conditioner. In other words, don't apply the wood conditioner right before leaving for work or going to bed - according to directions we followed, you must begin staining the wood soon after applying the wood conditioner, and we began staining as soon as the conditioner had dried - and it doesn't take long. To apply the wood conditioner, simply follow the directions on the can....which should say something along the lines of apply using a brush or cloth in the same direction of the wood grain. We let the wood conditioner sit for about 15 minutes, then we wiped off any excess that hadn't absorbed into the wood. Once dry, we flipped the countertops over and applied wood conditioner to the other side of the countertops. *Another IMPORTANT note - it is essential to treat not only the top, but the bottom of your countertop as well to ensure that the wood is adequately sealed. Butcher block is a very sturdy surface, but it must be properly treated to ensure it stays this way. Sealing all sides will prevent warping.
After all the wood conditioner had been applied, I got to work staining the wood. I was a little nervous at first (I may be a spray paint queen but I have never stained wood before) so I practiced on the scrap pieces left over after the slabs were cut to size:


I highly suggest doing this to get your technique down. It's actually not hard at all, but that little bit of practice gave me the confidence I needed so again I definitely recommend doing this. We used Minwax's Dark Walnut stain and I applied one coat to the bottoms of the countertops. Once they dried, I flipped them over and stained the tops:


At first, I thought we were going to have to apply at least 2 or 3 coats, but the color came out nice and dark (like I wanted) and I am happy with just 1 coat. My expert brother-in-law informed me that different woods vary greatly in their absorption, and this will affect how much stain is absorbed into your wood, along with drying time. Because we selected oak, it took a long time (I'd say at least overnight) for the stain to completely dry and we still had to wipe off some stain in the AM that hadn't fully absorbed. I was a little nervous about this but my brother-in-law assured me it was perfectly normal for the type of wood we were using. Here is what the countertops looked like in the AM after drying (they are still very dark because I haven't wiped off the excess stain yet):


To apply the stain, you can use a brush or cloth (Mr. C prefers cloth, I prefer the brush) and the most important thing is to apply in the same direction of the grain and make sure your strokes carry from one end to the other - no small strokes stopping and starting in the middle of the wood or else you'll end up with an uneven stain.
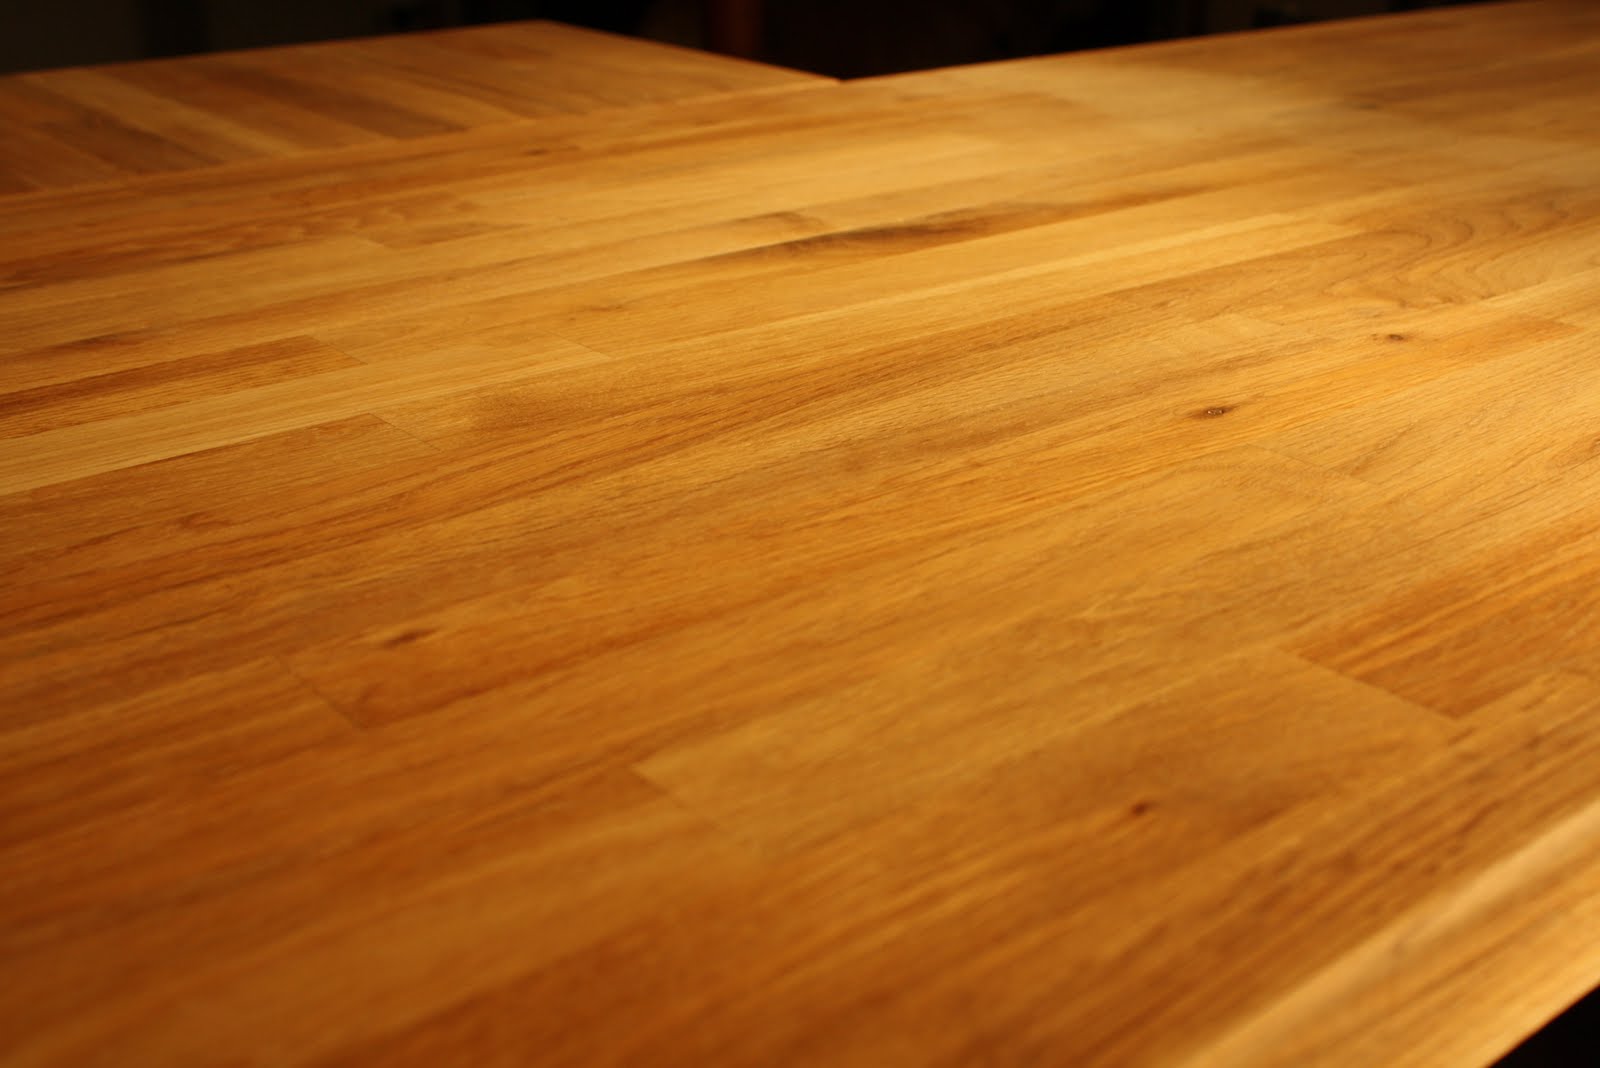
Here are a few pics of the countertops fully dry (finally!!):


 |
| *The small corner of the large countertop is not this light in person! It is the same color as the other pieces; I'm pretty sure it's just a glare resulting from my amateur photography skills in our dark basement. |
I will be sharing this post at the following parties this week - stop by and check out some great ideas generously shared by many other fearless, fabulous DIY bloggers out there!
I love the look of butcher block counter tops, and I love the color you stained them!! Can't wait to see the results. Martina
ReplyDeleteThey look beautiful! I'm glad my directions helped. I am posting about the rest of my kitchen this week, stop by.
ReplyDeleteAwesome! Love your kitchen. I used to have butcher block, love it!
ReplyDeleteHave a beautiful week ~
TTFN ~
Marydon
This looks great, so far! I put a good 75% of your inspiration kitchens on my Pinterest because they're exactly what we want to do in our kitchen!! I'm now following you so I can see the progress!
ReplyDeleteAlly @ Tiny Wallet Style
Beautiful! Thanks for linking up to Mad Skills Monday!
ReplyDeleteI have a butcher block island right now but want to increase the size. I'll be anxiously waiting to see how your project turns out as I've been looking at the IKEA butcher block too. Thanks for the great tutorial.
ReplyDeleteThis material is easy to clean and can be sanded and resealed when necessary; regular oiling is advised to avoid splitting and staining. Butcher block isn’t heat resistant and shows wear over time, but will give a rustic, lived-in look to any kitchen.
ReplyDeleteKitchen Benchtops
Not all DIY countertop upgrades go so well - as the editor of a site about countertops www.CountertopResource.com I hear of many horror stories. However, it sounds like your project went well and it is great that you posted so many images and details. Thanks for sharing!
ReplyDelete